Appearance
Properties
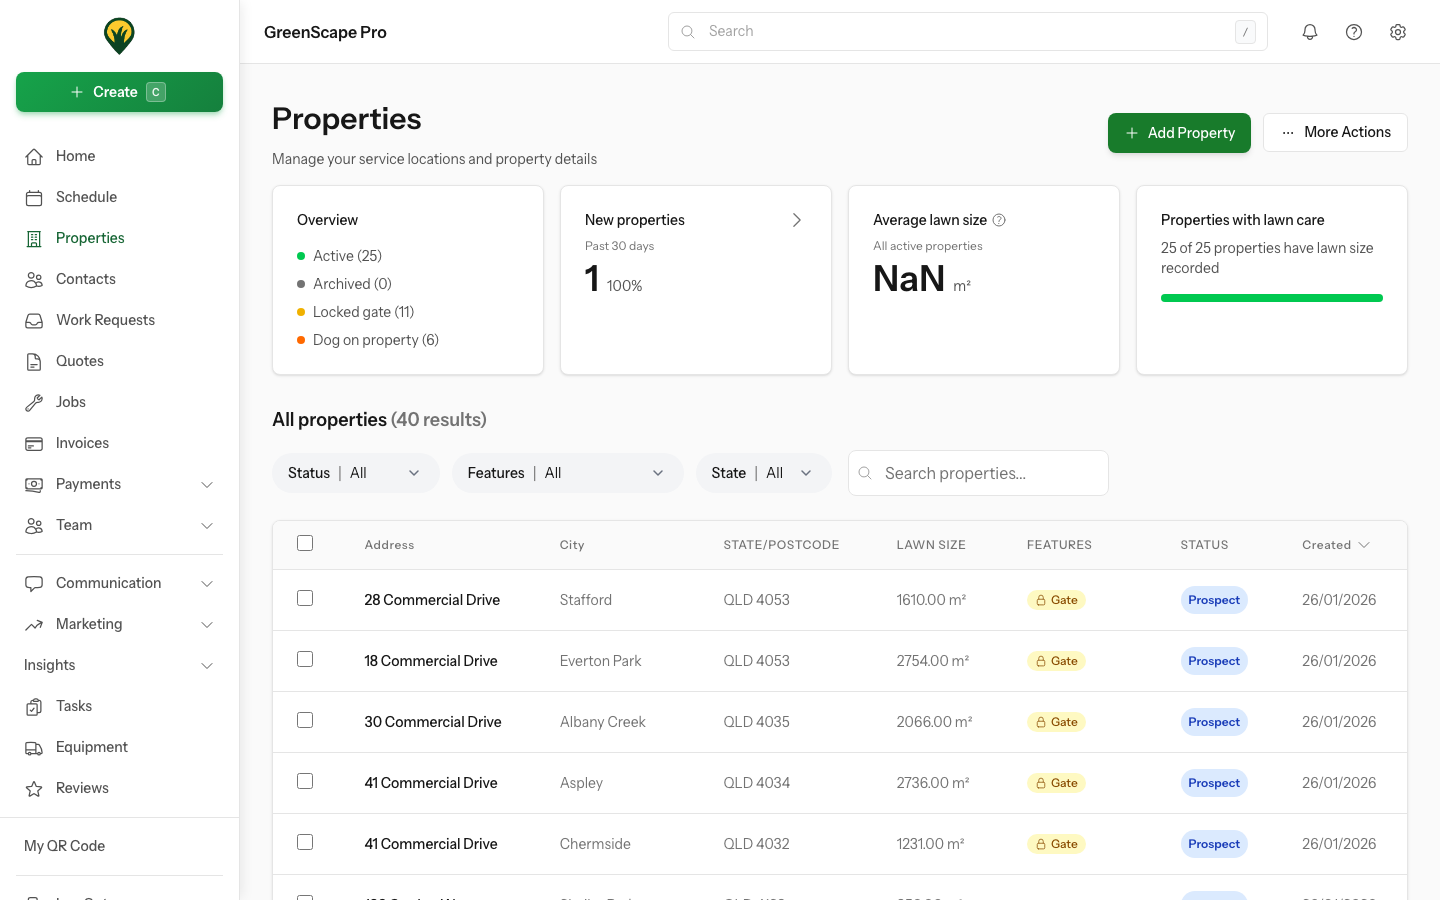
Properties are the foundation of YardPilot. They represent the physical locations where your team performs work—homes, commercial buildings, investment properties, and more. Every job, visit, quote, and work request in YardPilot is tied to a property.
Property Overview
Each property record stores:
- Address - Full street address with geocoding for maps and routing
- Characteristics - Lawn size, locked gates, dogs on-site
- Access Instructions - Gate codes, entry notes per contact
- Status - Lifecycle tracking (prospect, quoted, serviced, inactive)
- Tags - Custom labels for organisation
- Contacts - Multiple contacts with different roles (owner, tenant, manager)
- Service History - Jobs, visits, quotes, and work requests
Click to enlarge
Creating Properties
From the Properties List
- Go to Properties in the sidebar
- Click Add Property
- Enter the address details:
- Street address (line 1 and optional line 2)
- City/suburb
- State
- Postcode
- Add property characteristics (optional):
- Lawn size in square metres
- Locked gate indicator
- Dog on property
- Add notes for your team
- Click Save
From a Contact
When viewing a contact's profile:
- Click Add Property
- Enter the property address
- Select the contact's relationship type (owner, tenant, etc.)
- Add access instructions specific to this contact
- Click Save
From a Work Request
When a new customer submits a work request through the client portal, YardPilot automatically creates the property and links it to their contact.
Duplicate Detection
YardPilot checks for duplicate addresses when you create a property. If a matching address exists, you'll see a warning with options to:
- Use the existing property
- Create a new property anyway (for multi-unit buildings)
- Merge with the existing property
Property Details
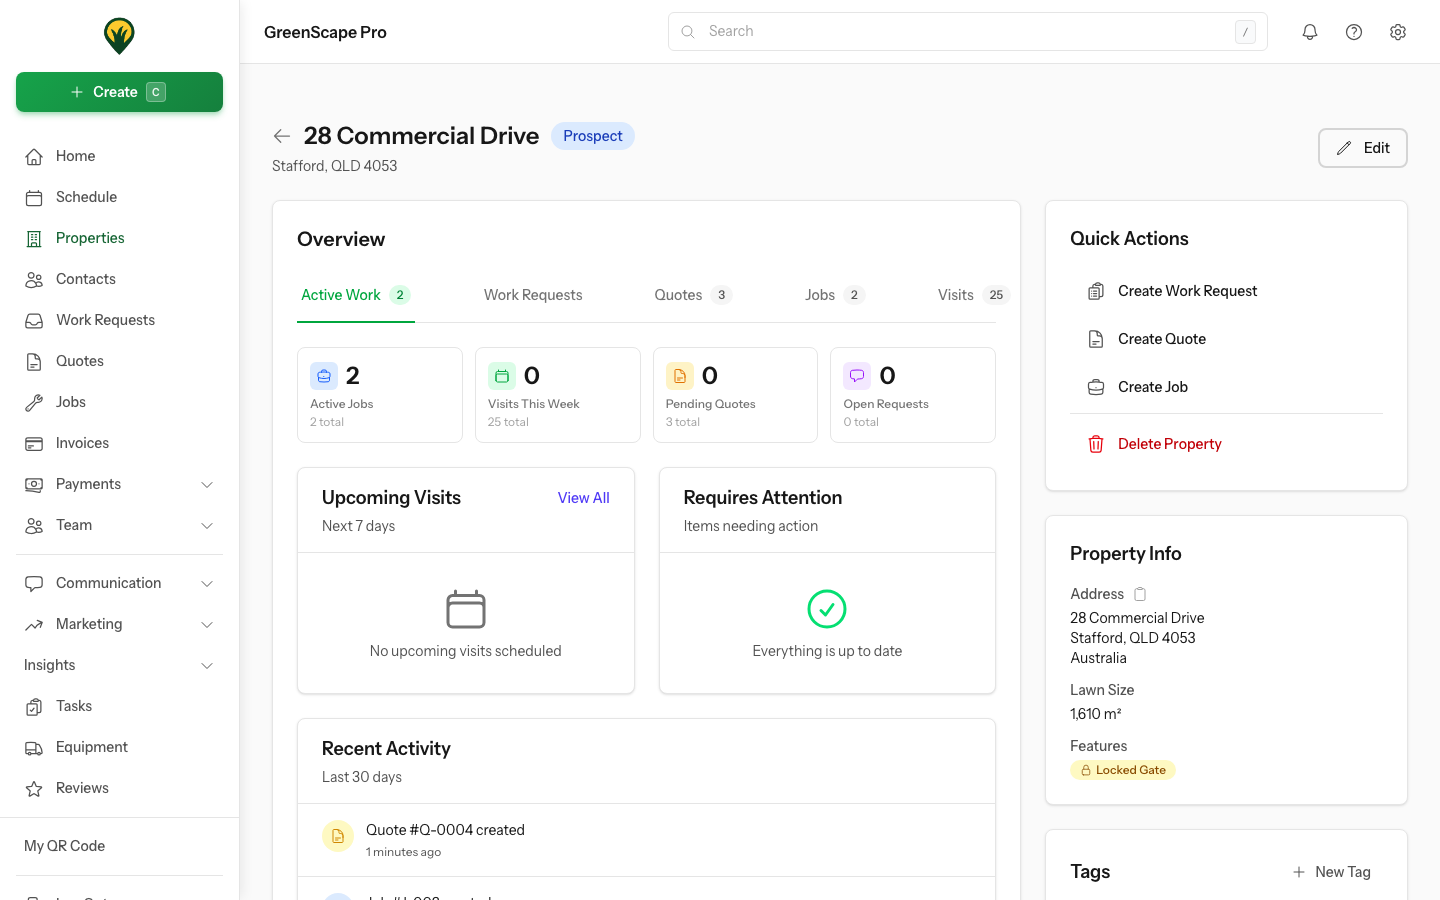
Click to enlarge
Address Fields
| Field | Description |
|---|---|
| Street Line 1 | Primary street address |
| Street Line 2 | Unit, suite, or building number |
| City | Suburb or city name |
| State | Australian state (QLD, NSW, etc.) |
| Postcode | 4-digit Australian postcode |
| Country | Defaults to Australia |
Geocoding
YardPilot automatically geocodes property addresses to latitude/longitude coordinates. This enables:
- Map views of your properties
- Route optimisation for field workers
- Service area assignment
- Distance-based scheduling
Property Characteristics
| Field | Description |
|---|---|
| Lawn Size | Size in square metres (for quoting/scheduling) |
| Locked Gate | Indicates gate code or key required |
| Dog | Warning that a dog is on the property |
| Notes | Free-text notes visible to field workers |
Field Worker Visibility
Lawn size, locked gate, and dog indicators appear on the mobile app during visits, helping your team prepare for each job.
Property Status
Properties automatically transition through lifecycle stages based on activity. This helps you track your sales funnel and customer engagement.
Status Values
| Status | Meaning |
|---|---|
| Prospect | New property, no quotes sent or work completed |
| Quoted | Quote has been sent but no work completed yet |
| Serviced | Active customer with recent or scheduled visits |
| Inactive | No activity in 30+ days and nothing scheduled |
Automatic Transitions
YardPilot automatically updates property status based on activity:
- Prospect → Quoted: When you send a quote to the customer
- Prospect/Quoted → Serviced: When a visit is completed or scheduled
- Serviced → Inactive: After 30 days with no completed visits and nothing scheduled in the next 30 days
- Inactive → Serviced: When you schedule or complete a new visit
Manual Override
Owners and Admins can manually set a property's status to override the automatic calculation. Use this for:
- Long-term contracts with infrequent service
- Seasonal customers
- Special arrangements
To override status:
- Open the property
- Click Edit
- Under Status, select Override status
- Choose the desired status
- Click Save
Lifecycle Timestamps
YardPilot tracks key dates in each property's lifecycle:
| Field | Description |
|---|---|
| Last Visit | When the most recent visit was completed |
| Next Scheduled Visit | When the next visit is planned |
| Became Serviced | Date the property first became active |
| Became Inactive | Date the property was last marked inactive |
These timestamps power reporting and help identify at-risk customers.
Managing Contacts
Properties can have multiple contacts with different roles. Each contact can have property-specific access instructions.
Contact Types
| Type | Use Case |
|---|---|
| Owner | Property owner (primary billing contact) |
| Tenant | Renter living at the property |
| Manager | Property manager handling bookings |
| Emergency | Emergency contact (neighbour, relative) |
| Billing | Alternative billing contact |
Adding a Contact to a Property
- Open the property
- Click Add Contact
- Search for an existing contact or create new
- Select the relationship type
- Mark as primary contact if applicable
- Add access instructions (optional):
- Gate code
- Entry instructions
- Click Save
Primary Contacts
You can mark one contact as "primary" for each type. The primary owner receives invoices and primary tenant gets visit notifications by default.
Access Instructions
Store property-specific access details for each contact:
- Gate Code - Numeric or alphanumeric codes
- Access Instructions - Detailed entry notes
Security
Gate codes are visible to field workers on the mobile app. Only add codes that your team needs.
Notification Preferences
Control which automated notifications each contact receives for this property. Click the email or SMS icon next to a contact to manage their preferences.
Each contact type has sensible defaults:
- Billing Contacts receive all notifications (visits, quotes, invoices)
- Site Contacts receive visit-related notifications only
- Property Managers receive visits and quotes
- Emergency Contacts receive no notifications by default
You can customise these defaults for individual contacts. See Notification Preferences for full details.
Property Tags
Organise properties with custom tags for filtering and reporting.
Common Tag Examples
- Commercial - Business properties
- Residential - Home properties
- Pool Service - Properties with pool maintenance
- Lawn Only - Properties with only lawn care
- VIP - High-priority customers
- Quarterly - Properties serviced quarterly
Adding Tags
- Open the property
- Click Tags
- Select existing tags or type to create new
- Tags save automatically
Filtering by Tags
Use tags to filter your property list:
- Go to Properties
- Click the Filter button
- Select one or more tags
- View filtered results
Merging Duplicate Properties
When duplicate properties exist (same address entered multiple times), merge them to consolidate records.
Merge Preview
Before merging, YardPilot shows you:
- Which fields differ between properties
- How many jobs, quotes, and contacts will transfer
- Any potential conflicts
Performing a Merge
- Open the property you want to keep (the "survivor")
- Click the menu (⋮) → Merge Properties
- Search for and select the duplicate properties
- Review the merge preview
- Resolve any conflicts
- Click Merge
What Gets Merged
| Data | Merge Behaviour |
|---|---|
| Jobs | Transfer to survivor |
| Quotes | Transfer to survivor |
| Work Requests | Transfer to survivor |
| Contacts | Merge relationships (deduplicated) |
| Tags | Combined (duplicates removed) |
| Notes | Concatenated from all properties |
| Characteristics | Survivor's values kept |
Permanent Action
Merging cannot be undone. The duplicate properties are soft-deleted with a reference to the survivor for audit purposes.
Import & Export
Importing Properties
Bulk import properties from a CSV file:
- Go to Properties
- Click Import
- Download the template CSV
- Fill in your property data
- Upload the completed file
- Review the import preview
- Click Import
CSV Columns:
street_line_1(required)street_line_2city(required)state(required)postcode(required)lawn_sizelocked_gate(true/false)dog(true/false)notescontact_name(creates/links contact)contact_emailcontact_phone
Exporting Properties
Export all properties to CSV:
- Go to Properties
- Click Export
- The CSV downloads automatically
Exports include all property fields plus linked contact information.
Permissions
| Role | View | Create | Edit | Delete | Status Override |
|---|---|---|---|---|---|
| Owner | ✓ | ✓ | ✓ | ✓ | ✓ |
| Admin | ✓ | ✓ | ✓ | ✓ | ✓ |
| Office | ✓ | ✓ | ✓ | ✗ | ✗ |
| Field | ✓* | ✗ | ✗ | ✗ | ✗ |
*Field workers see properties for their assigned jobs only.
Deletion Restrictions
Properties cannot be deleted if they have:
- Scheduled visits in the future
- Active (incomplete) jobs
Archive inactive properties instead of deleting to preserve history.
Best Practices
Accurate Addresses
- Use consistent formatting (e.g., "Street" not "St")
- Include unit numbers in Street Line 2
- Verify postcode matches suburb/city
Maintain Property Characteristics
- Update lawn size when it changes
- Mark locked gates immediately
- Note dog presence for worker safety
Use Tags Consistently
- Create a standard tag system for your business
- Tag all properties when created
- Review and update tags periodically
Regular Data Hygiene
- Merge duplicates as you find them
- Archive truly inactive properties
- Update outdated contact information
Access Instructions
- Keep gate codes current
- Add detailed entry instructions for complex properties
- Note parking restrictions or entry times
Property Statistics
View property statistics by status on the Properties page:
| Metric | Description |
|---|---|
| Total | All properties in your account |
| Prospect | Properties awaiting first quote |
| Quoted | Properties with sent quotes |
| Serviced | Active properties with recent/upcoming work |
| Inactive | Properties with no recent activity |
Use these metrics to track your sales pipeline and customer retention.
Next Steps
- Create a job for a property
- Send a quote to a property contact
- Set up service areas to organise properties geographically
- View the schedule to see upcoming property visits
- Configure notification preferences for property contacts